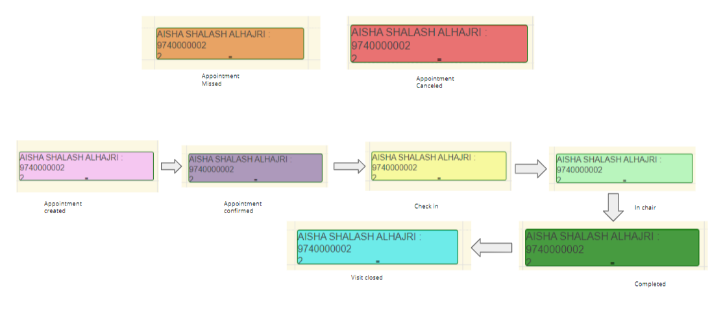
Scheduler colors
Usage of scheduler colors
Every appointment has several stages that it goes through. These stages are specified by the appointment status. For the user's convenience we have given different colors for different status. And, this can be viewed in the ‘calendar view’ of appointments.
-
Pink : Appointment created.
-
Purple: Appointment confirmed
-
Yellow: check in.
-
Green: in chair
-
Dark green: Completed.
-
Blue: Visit closed
-
Orange: Missed appointment
-
Red: Cancelled appointment
Creating An appointment
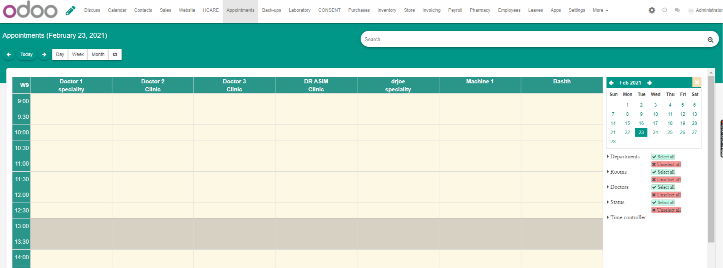
To create an Appointment, select appointment from the top navigation bar. From the calendar select a time slot for the specific appointment under the specified doctor’s name.
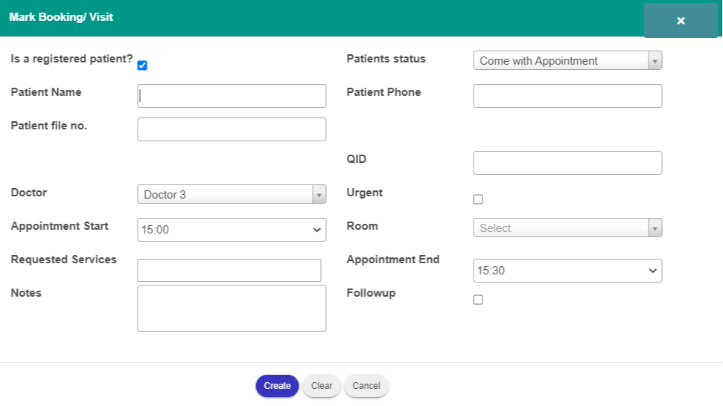
A new wizard will appear on the screen asking to provide the patient info. If it’s a new patient uncheck “Is a registered patient?” and fill up all the information. Then click on Create.
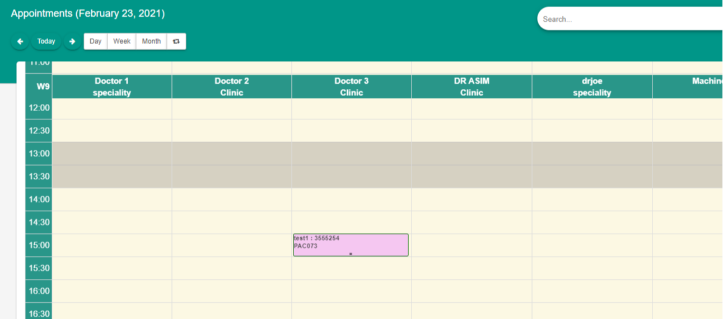
An appointment will be created and will be visible on the calendar.
Appointment status and modifications
Once the appointment is created, the reception/front desk can confirm, cancel or reschedule the appointment upon patient confirmation. (see picture below)
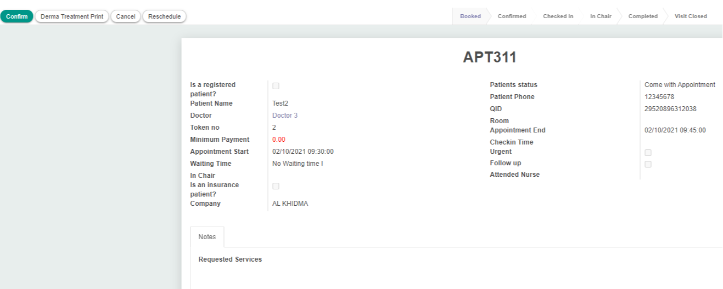
Confirm/Cancel
Click on the desired button to confirm or cancel the appointment.

You can still reschedule an appointment after cancelling it by clicking on the reschedule button.

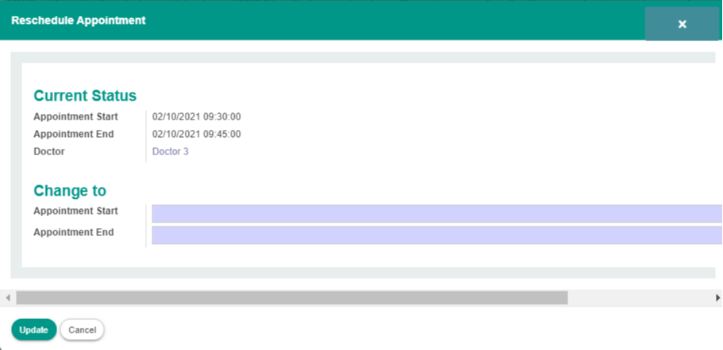
Rescheduling
-
For rescheduling an appointment, click on the reschedule button.
-
A new window will appear. (see picture below).
-
Provide the appointment start and end time.
-
Click on update to reschedule or cancel to cancel rescheduling.
Check in status
After confirming an appointment, whenever the patient arrives at the clinic, the appointment status has to be changed to check in status.
Note: Once a patient appointment status is changed to “check in”, a file for the patient will be automatically created by the system and can be used for future appointments or references.
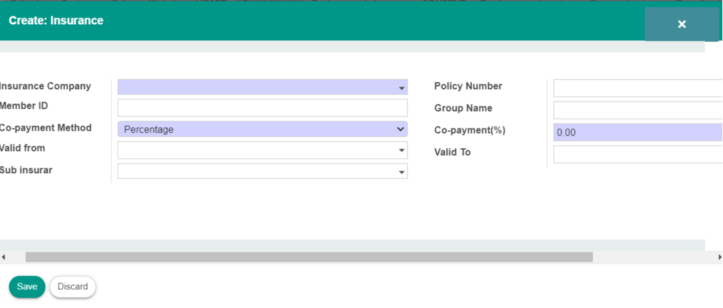
Providing insurance details in appointments
After confirming a patient's appointment, Insurance details can be provided in two ways:
1. The reception can provide the insurance details while the patient is “in checked” in status.
2. The doctor or nurse can provide the details while the patient is in chair status.
Note: All the fields in purple are mandatory.

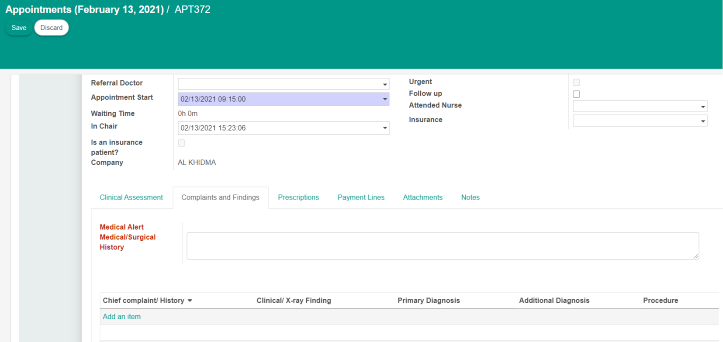
In chair status
In chair status is when the patient goes to the doctor's room after check in. The doctor/nurse can change the “checked in” status to “in chair”.
Then the doctor can do the necessary examinations and treatments and update the patient details in the appointment accordingly. Following are the fields where doctors can fill in the details as needed.

1 . Adding Clinical Assessment details
Clinical assessment is pre-examination that is usually done by the nurses before going to the doctor’s room. Simply by clicking on the edit button from the appointment, the nurse can select the clinical assessment tab and fill up all the necessary details upon examinations. They can also attach files for lab examinations or scans. (See picture below).

2 . Adding Complaints and Findings.
This field is particularly done by doctors. And is used to record a patient's history.
Steps:
1. Click on the edit button. Then select the “Complaints and Findings” tab.
2. Specify medical alert or medical history if any.
3. Click “add an item” to add the necessary details.
4. Click save once done.
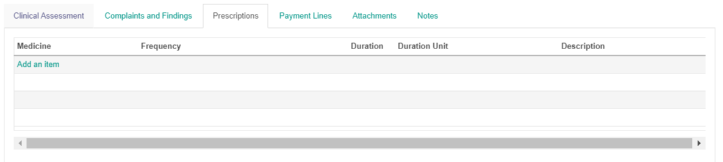
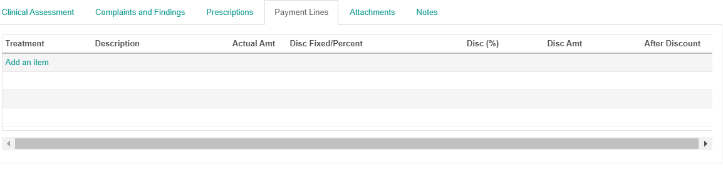
3 . Adding Prescriptions and Payment lines.
Prescription is for the doctors to prescribe medicines that will be handled by the pharmacy. And payment line is to indicate the payments for any treatments done by the doctors with the charged amount for the reception to finalize the payments.
Steps:
1. For both the cases, click edit first.
2. Then click on “add an item”.
3. Provide the necessary information as specified.
4. Click on “Save”
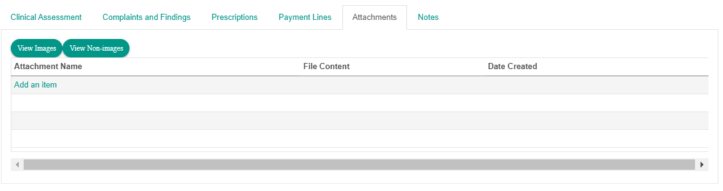
4 . Adding Attachments and notes.
Attachments are for the doctors to attach and files of the patient if needed and notes are to put any notes for their own references in the future.
Steps:
-
In both cases, simply click edit.
-
Then click on “add an item” to upload or attach files. For notes simply type your information. (see pictures below)
-
Click “Save”.
Completed status
Once the doctor completes the treatment/consultation in a patient, he will mark the appointment as completed. In this case, an invoice will be generated.
Visit close status.
When an invoice is validated and payment is registered, the appointment status changes to “Visit close”.
Reopening an appointment
After an appointment is completed by the doctor, it can be reopened in case any information is to be changed.

Steps:
-
Click on the “re-open” button.
A new wizard will appear on the screen asking for the reasons. The purpose of this is for future reference to record why this certain invoice was cancelled and a new one was created.

-
Type the reason and click on the “confirm” button.
Then the appointment status will change back to in chair status, and the invoice will be cancelled. -
The user then can do the needed modifications(for instance: change treatment,change price and so on) and mark complete again.
A new invoice will be created after that.